SignSlapper Quick Start Guide
Intro
SignSlapper was designed to help you create quality signs with the least amount of effort as possible.
How It Works
1. Open the program
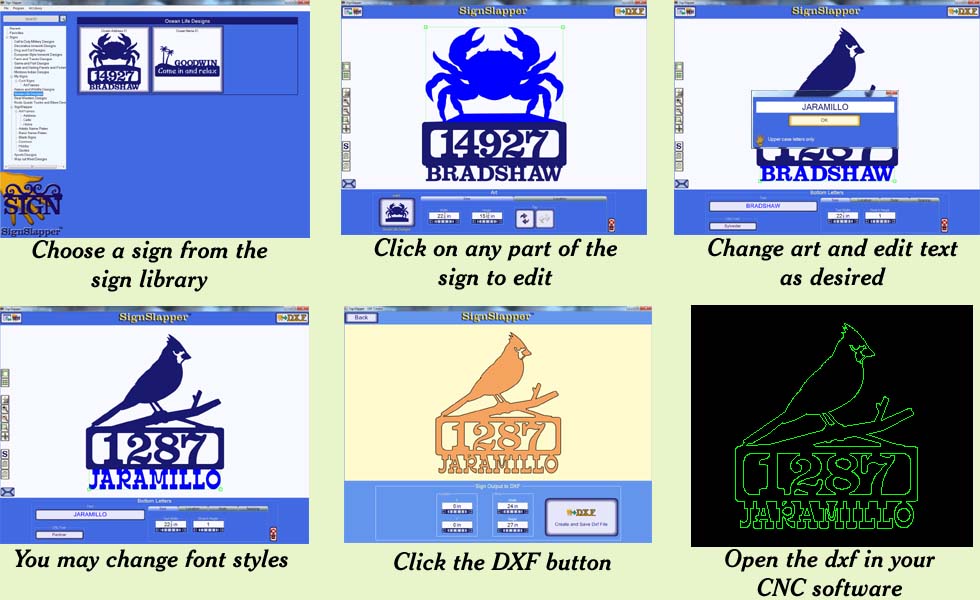
2. Choose and open a sign from the sign library included with the program
3. Click on any part of the sign that you wish to change
4. Make any changes you desire (edit the text, font styles change artwork, resize, etc.)
5. Save the dxf file
6. Import the dxf into your CNC software for cutting (this example was created in 38 seconds)
Sign Frame Styles
SignSlapper has two frame styles
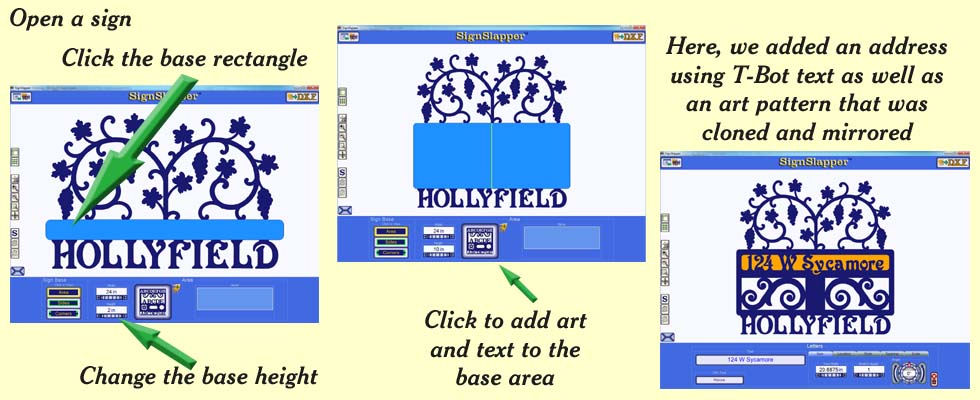
1. Rectangular customizeable – You may place art or text on any side as well as art and text within the frame area of the sign.
2. Art frames – Specially created artistic frames. Depending upon the pattern, the sides cannot be customized. However, you can place text and art within the frame area.

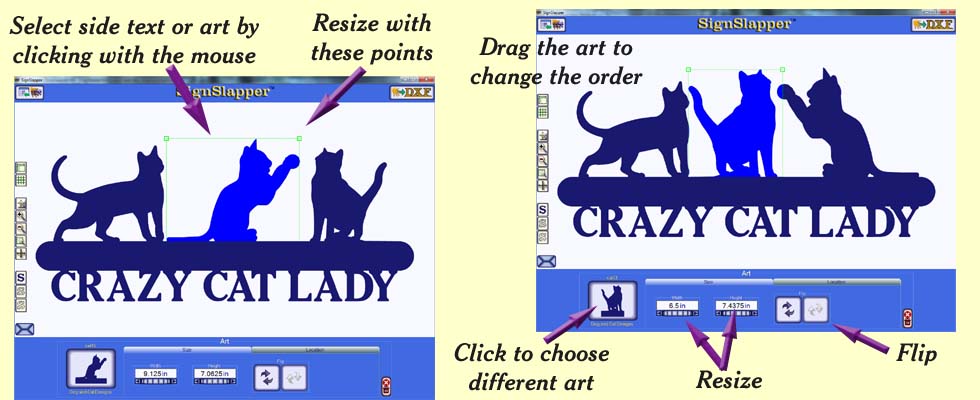
Side Art
You can quickly add many different art patterns to the side of a sign. Then, you can select a single art pattern to move, resize, flip and change the order the patterns appear on the sign. You may also change the art pattern for another in the library or remove it.
Adding Cutout Text or Art to the Base Area
You can add art cutouts, stencil text, and T-Bot text